Makeup Experiment: Reusing e.l.f. Plumping Lip Glaze Tubes
A few months ago, I looked at a near empty tube of e.l.f.’s Plumping Lip Glaze and had this crazy idea: What if I cleaned the container and replaced its content with e.l.f.’s Super Glossy Lip Shine?
I like the Super Glossy Lip Shines a lot better than the Plumping Lip Glaze, but I prefer the tube of the latter, so it was an intriguing idea. I kept a couple of the Super Glossy Lip Shine tubes that spontaneously broke, sitting unloved in the darkness of a box. I could both reuse the Plumping Lip Glaze tube and keep two Super Glossy Lip Shine shades at once safely in my purse. Sounded like a great idea.
Erm, it didn’t quite turn out as anticipated. While the experiment was technically a success, it was a complete–horribly messy–pain. I am so glad no one was around to witness all the crazy things I did.
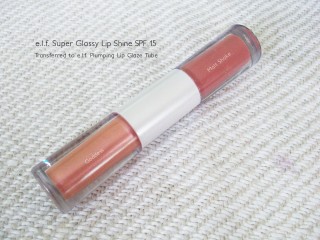
Plumping Lip Glaze tube refilled with Super Glossy Lip Shine
Partly through the event, I grabbed my camera and started snapping away. I’ll show you how it’s done.
Gather Your Supplies
Obviously, you need an empty (or near empty) Plumping Lip Glaze and a couple tubes of Super Glossy Lip Shines you don’t mind destroying. But hey, they’re only a buck. You can use a broken container if you have one lying around, or you can cut off the bottom.
You also need a tiny dowel or bamboo skewer, tissues/bathroom paper and an X-Acto knife or small knife to pry off the top of the tubes.
The process is extremely messy, so it’s a good idea to attempt the experiment over a bathroom or kitchen sink with access to a lot of soap and paper towels.
Getting Started
Before I go further, I’d like to comment on how this product is a total rip-off, especially when compared to the Super Glossy Lip Shines. Not only is the tube intentionally misleading in terms of how much product it holds, the sponge applicator is created in such a way one cannot possibly extract all of the lip gloss. This is very noticeable when you clean the tubes.
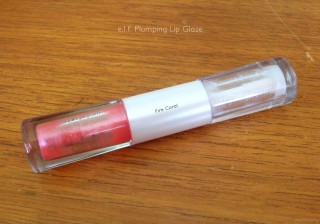
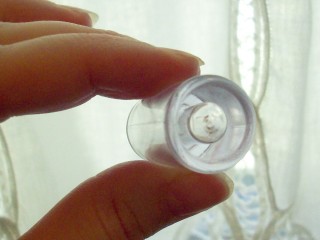
Empty Plumping Lip Glaze tube.
The first step is to take one of the two small Plumping Lip Glaze tubes. Set aside the rest of the container on a paper towel.
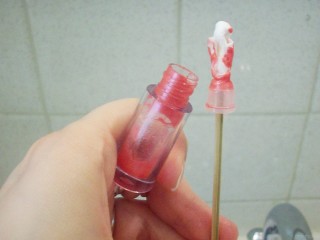
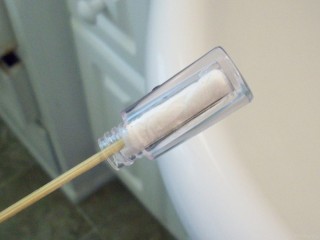
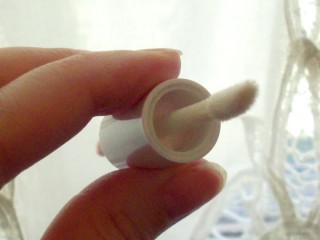
Back to the instructions. We need to pry off the top of the tube before we get to the dirty part. Initially, I didn’t think I could get it off, but the lid removal was one of the easiest steps. I’m fairly certain you can do this step by taking an X-Acto, or other small paring knife with a thin blade, to carefully pry off the lid.
That’s not what I did. Since I didn’t think I could remove the lid, I wrapped a small piece of tissue around the bamboo skewer, inserted it straight into the tube and proceeded with the cleaning process. After completing the experiment, how I believed I could clean and refill the tubes without removing the top is beyond me. I was naive.
Removing the top of the Plumping Lip Glaze tube
The tissue slipped off of the skewer and became trapped inside the tube. I used a larger piece of tissue, but the whole thing got stuck. I thought the experiment was finished, but I gave the skewer a hard tug and, voila, the top came off.
Top of tube all clean and ready
Clean with soap/water, tissues, or whatever works.
Cleaning the Tubes
The tube is fairly simple to clean with tissue (water & soap won’t work well). You only need time and patience.
Cleaning the Plumping Lip Glaze tube.
I like to roll half a piece of bathroom tissue around one side of the bamboo skewer, leaving about half of the paper extending off the end. Fold the excess tissue back over the skewer, twist it a bit to make it stay put, and insert into tube. Discard the used tissue into a trash can to reduce mess to the sink and counter-tops.
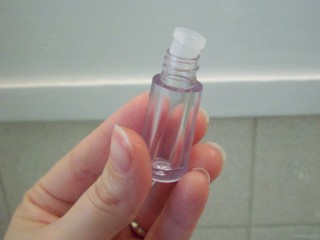
Cleaned Plumping Lip Glaze tube. It doesn’t hold a lot of product.
You now have a clean tube. Repeat with the other side.
The Down and Dirty
You may have thought the cleaning stage was messy, but you haven’t seen nothing yet.
It may be possible to squeeze the lip product out of the Super Glossy Lip Shine tube directly into the Plumping Lip Gloss tube. Both of my containers were severely broken, so that wasn’t an option for me. One of the tubes broke at the neck, where the tube and lip applicator meet, while the other came unsealed at the bottom.
Cleaned Plumping Lip Glaze tube with top.
I really believed I could just squeeze the lip gloss and it would flow nicely into the tube. It didn’t. I took the tube with the unsealed bottom and attempted to squeeze it directly into the tube, only to discover that the Super Glossy Lip Shine is apparently impervious to gravity.
It. Would. Not. Go. In. The gloss became stuck in the neck of the tube and refused to go further, no matter how much I poked it with the skewer.
Then I figured I could inject the gloss straight into the tube via a children’s medication dropper (the kind of oral syringe that looks like a turkey baster). Hah! Total fail. The end was too large to extend all the inside the tube so the gloss filled the neck and quickly overflowed in a gooey mess.
I’ll pause here for a second. You may have noticed there are no photos for refilling the tubes. That’s because I had goopy lip gloss all over the sink, counter and my hands and didn’t want to risk damage to the camera.
Filling the Tube
Here’s my high-tech solution for refilling the tube. After cutting open the bottom of the Super Glossy Lip Shine, take another skewer and dip one end into the lip gloss. Insert the skewer all the way into the tube and scrape off the gloss by using the hard edge at the bottom of the tube’s neck. Because it’s super gooey, not all of the gloss will come off. It’s not a grand process, but it works somewhat.
Repeat until the tube looks full. You can attempt to push the gloss further into the tube, but that usually results in the product sticking to the skewer.
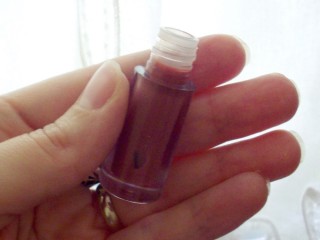
Refilled Plumping Lip Glaze tube with Super Glossy Lip Shine in Malt Shake.
There’s no way to tell when the tube is full of gloss. You have to guess. Keep in mind that the wand takes up a fairly substantial portion of the tube’s volume. The first side I filled may have been too full, because some of the product came out when I re-inserted the applicator. Or maybe there was an air bubble. Who knows. The point is, the Plumping Lip Glaze tubes don’t hold much product.
Press the top back on and you’re finished. Repeat for the other tube.
Finishing Up
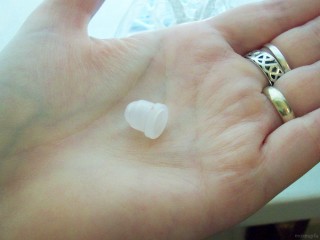
After you’ve finished refilling the tubes, you’ll need to wash the sponge applicator. The Plumping Lip Glaze may not have the same dense consistency of the Super Glossy Lip Shine, but it’s still made from mineral oil. To put it another way, the wand takes forever to clean.
Cleaned Plumping Lip Glaze wand and sponge applicator
Use more tissue to clean the base (where the applicator meets the middle part of the container) in the same way you cleaned the lip gloss tubes. Wash the wand and sponge applicator with soap of your choosing. This will take several washes due to the stubborn mineral oil. Let dry or dab carefully with tissue.
All finished! You now have a tube with two Super Glossy Lip Shine shades that can be safely carried in your purse or pocket.
Despite the hassle, it’s actually kind of cool. I might even attempt the experiment again (if I’m bored or something).





My suggestion for the next time you refill is to stand the lip shine tubes in a mug of boiling water. The gloss will liquify, making it easier to squeeze into your tube.
this was really helpful! was just trying to do something like this but it wasn’t working! thanks for the post!